Tuesday, December 4, 2012

Christmas Tags

You know those wrapped Christmas gifts and holiday goodies are going to need the perfect gift tags.  Maybe the two I have here will give you a little inspiration. 
 
This Snowman Tag was made using an older Stampin' Up stamp. I used Copic markers to color him.  The snowflake punch is from Martha Stewart and the pattern paper is from a Michael's paper stack.  I added some bling and a little glitter too.
 
 
This is a tag I plan to use when I give baked goodies. The fun thing about this tag is that it is scented.  You read it right...scented.  Kind of like a scratch and sniff sticker. The embossing powder I used on the gingerbread men has a yummy smell to it. Isn't that cool?  I wish you could smell it! Not only does the tag smell good, but your craft area smells nice after using it too.
 I used: Gingerbread Kaylee clear stamp set from Some Odd Girl, Sugar & Spice scented clear embossing powder from Stampin' Up, brown ink, and Copic Markers.
 
Here you can see the how shiny the embossed image turns out.

Monday, December 3, 2012

Snowballs Anyone?

Today I am sharing a small holiday gift idea that you can make pretty easily.  I used my Silhouette cutting machine, my printer, a Some Odd Girl digi stamp, and white gumballs.
 
I am linking this project up to the Some Odd Girl Annual Hol-ODD-day blog hop. If you would like to link up or hop along, go here for all of the details. The hop lasts from Dec 3rd through Dec 6th....so get on over there and check it out.
 
You could use any size white gumballs for this project, but I like these "Snowball" kind.
 
Using my Silhouette and a sheet of pattern paper, I cut out the milk carton shape. Other than folding, there isn't much assembly to this container.  Then fill it up with gumballs and give it to your gum chewing friends as a fun little gift.
 
This is the front of the carton...with Snowball Tia.
                
 The side view.  I just printed out the label, inked the edges, and wrapped it around the entire carton.

 I used a double sided paper, so even the inside of the carton is cute.


Here is a close up of Snowball Tia. She is a SOG digi stamp. I used Copics to color her and a puffy heat embossed gel for her snow ball. There is a little glitter on the snowball, but you can't really see it here.

Thursday, November 22, 2012

HAPPY THANKSGIVING!!

Wishing everyone a Happy Thanksgiving! 
This is Indian Tia, a Some Odd Girl digi stamp.  She is colored up with Copic Markers.

Wednesday, November 21, 2012

Thanksgiving for the Kiddos

I haven't had much time to do Thanksgiving crafts this year, so I thought I would repost some older things I did a few years ago. These are great if you have kids.

Here is the kids' table.

The place mat is construction paper and the table is covered in craft paper. Everyone gets crayons to doodle on it all they want.

A simple little banner.


Here is the big paper bag turkey. His "stuffed" with popcorn. The kids got to carve him themselves.

The corn is a goody bag full of stuff to keep the kids busy. Silly putty, a comic strip, stickers, gel pen, pop rocks and smarties.

This is what it looked like at their seat. They even had their own mini pumpkin

Monday, November 19, 2012

Fall Cards

Here are a couple of fall cards that I made.  The pictures turned out a little yellow, but you can still see how cute these stamps are. 
 

I entered this one in the sketch challenge going on at the Some Odd Girl Blog.

Tuesday, October 30, 2012

Trick or TREAT?

This is a little Halloween treat I put together for some of the ladies I crochet with.  Of course there is real candy, but I also included  a crochet Amigurumi candy corn too.  To make the cute little candy corn use the Lion Brand pattern that you can find here.


The little owl is from Stampin' Up!


Monday, October 22, 2012

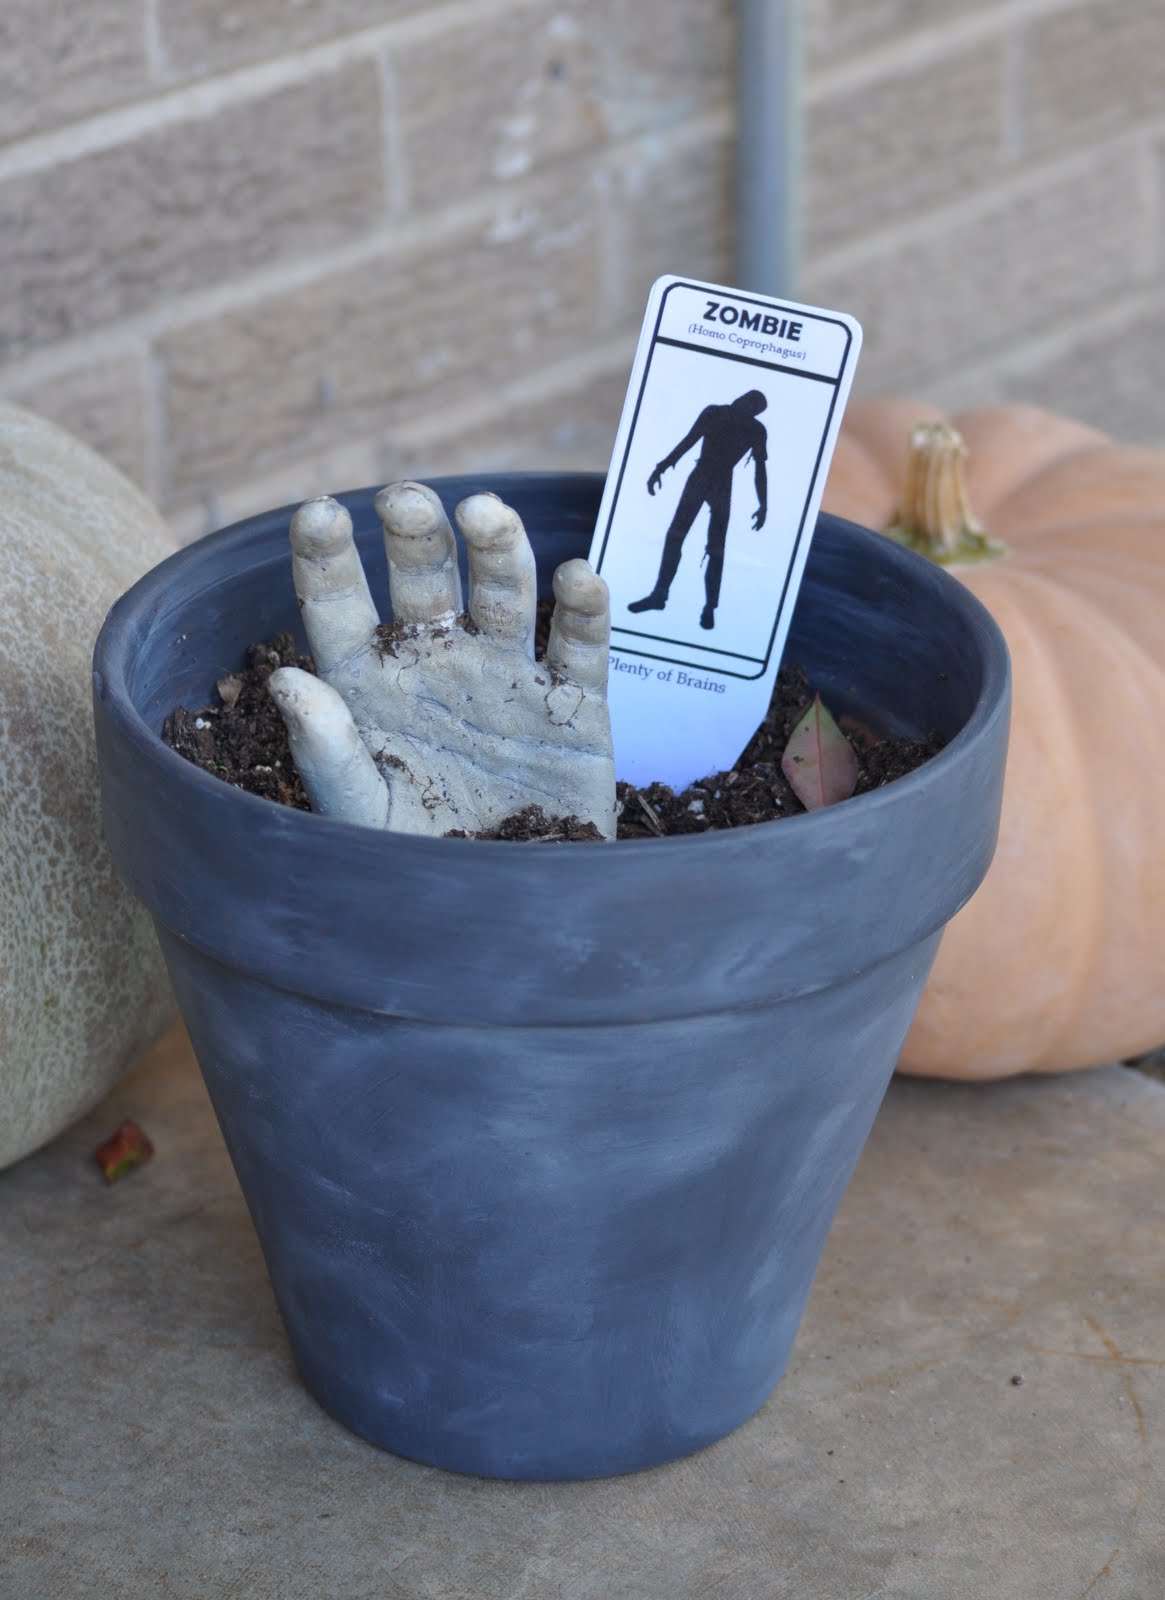
Grow your own Zombie!

This is an idea I found on Pinterest.  {Don't you just love Pinterest?!?}  My family is zombie crazy, so I knew I had to make it.  The one I pinned went back to a photo and not a web site with instructions, so I just tried to make it based on the picture.
 
My kids and I made our own hand with plaster, but you can get a hand (and other body parts) at the Dollar Tree.  After the hand was dry I painted it with craft paint that was a mix of gray and a little peach color.  Then I watered down some dark gray to rub into the wrinkles and around the finger nails.  I painted a terracotta pot, filled it with dirt, then stuck the hand in.  Pretty easy, right?  I found a link online that had a printable plant label you can use as the information stake.  It's like the ones you find in new plants, only zombiefied. It looks very similar to the one they used on the original pin. Here is the link: zombie plant label


This is the back of the hand and label: